The Ultimate Guide to hair background removal /Image Masking
If we are graphic designers, then we must have heard about masking.
But what image masking is in the first place, and how do they even work, or how can we create them?
There are various masking techniques that we can use and learn from Illustrator, InDesign, and Photoshop. Therefore, in this article, I’ll discuss all the ins and outs regarding image masking and how we can create one by ourselves.
So, read till the very end to know all about it.
What’s Image Masking?
No matter what sort of photo editing software we use, image masking is essential, especially while making any selective adjustments.
Although each type of editing software or program has different kinds of masking or layer adjusting systems, we have to make the area enhanced so that the image gets set in our targeted areas.
Depending on the type of photo editing program we use, there are various ways we can mask our image.
So, in short, masking and image or Image Masking means we are limiting specific layers or adjustments so that the desired part of our image is just visible.
To put it into simple words, we have to make such masking adjustments to have precise control of where we want to make all these adjustments.
As we have understood the fundamentals of this procedure, let us discuss it more in-depth now.
What Does “Masking” an Image Mean?
Masking an image means we will make such selective adjustments to cut off any areas where the adjustments are taking place.
The procedures might look different, depending on the type of editing software we use, but the result will always be the same.
For instance, when we mask an image in Photoshop, we are actually working with a kind of layer mask. Here, we have the liberty to make any type of adjustments, using white, black, or grey, to select a particular adjustment’s transparency.
So, no matter what sort of image masking program we go for, we’ll have to come across masks either in the form of dedicated layer masks like the one in Photoshop or spot adjustments like in Adobe Lightroom.
Both these options serve a single purpose: to mask or make adjustments with the image, just like any other photo editing option.
Types of Image Masking and Ways to Make Adjustments
Honestly, there are various kinds of techniques that we can use to mask our image. Many such programs support these masking options. Just the methods might vary, but the result is the same for all these programs.
So, we’ll only focus on Lightroom and Photoshop in this article. By doing this, our concept of masking the image will get clear.
Image Masking Adjustments in Photoshop
Here, we’ll get to know the 5 frequent Image masking types available in Photoshop in this section.
This entire program is based on layer editing software; it uses dedicated layer masks for every single layer.
1. Alpha Masks
The very first image masking option we’ll get in Photoshop is Alpha Mask. This method uses color channels in the image to separate certain edges primarily based on the image’s contrast.
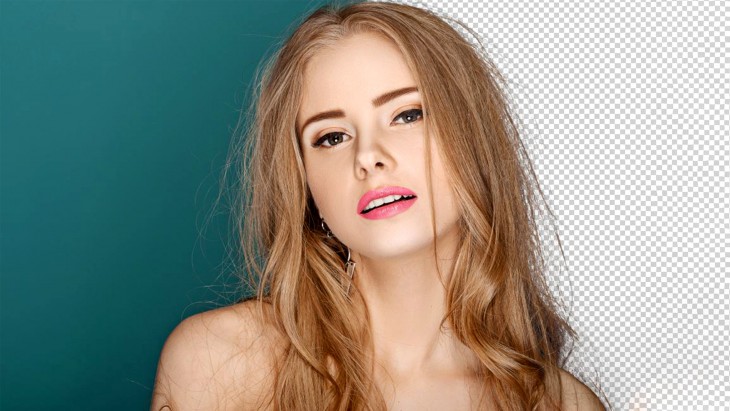
Using this particular contrast, we can easily apply complex masking adjustments easily. For instance, we could choose the hard edges of a person’s hair or even perfectly remove all the trees from our background.
Even many advanced photographers and editors choose Alpha Mask to accurately mask around the edges, which would be impossible to select.
2. Clipping Mask
Clipping masks allow us to isolate a visible layer just by resisting it to mix with another layer.
For instance, if we want to fill a particular text layer with a simple image, we could apply a clipping image between the text and image. This will result in our image being visible with the text layer.
This type of adjustment can be used for varieties of applications. Moreover, in this kind of masking, we don’t need any sort of selection beforehand. This is because it uses a single layer and refines the visible area of another.
3. Layer Masking
One of the primary ways of Image masking is by using a brushing tool and manually painting all over the image.
Just by using white and black, we can easily paint anywhere on the photo to isolate the image’s transparency.
For instance, if we want to make the sky darken, we can use this method by creating a brightness adjustment layer and then refining the mask so that it’s only visible in the sky.
This technique provides a practical and straightforward way to exactly choose where a layer or adjustment is visible—-and all of this can be done with the help of the brush tool!
4. Vector Masks
Before we understand what it is, we must know the difference between a vector and rasterized layers.
Vector masks are vastly used in graphic designing, which is actually a way to maintain sharper and better edges in our image. Instead of making pixel-based masks, these vector masks are resolution-independent routes that are made with the help of anchor points by using a shape tool or pen tool.
If we are someone working with graphics or text, then using vector masks will help us maintain sharper edges, mainly when exporting files as SVG or PNG files.
Although for selective adjustments and standard image editing, vector masks are not commonly recommended. However, these are still a vital part of masking!
5. Gradient Masks
The final kind of masking in Photoshop is the gradient mask. These are just similar to layer masks. The only difference in the gradient mask is it uses gradient adjustment rather than a brush tool to refine the layer mask.
This actually offers a unique advantage, especially when we’ll blend the adjustments, as we can very quickly get a pure transition between transparency and visibility.
Gradient masks can be made by using a Gradient tool adjustment onto a single layer mask. So, simply by using white and black in the gradient, we can easily make seamless transitions.
Making Adjustments in Lightroom
Lightroom doesn’t make any adjustments with individual masks or layers. Instead, it works with selective adjustments that directly apply masks onto an image. This kind of masking is usually found in programs that don’t use layers.
1. Adjustment With Brush Masks
Selective Adjustment Brush is the initial method of Image masking in Lightroom. This particular tool enables us to paint a specific area of selection on our image, which can then be used to isolate any specific adjustments. Although it might be termed “selective” adjustments, in reality, it’s just another simple masking technique.
Here we can adjust our brush’s toughness, opacity, and flow to make it effortlessly blended. This tool is just remarkable to make precise adjustments without causing any issues in the surrounding areas.
2. Gradient Filter Masks
The gradient filter also applies a mask onto our image, but it’s more like a gradient than a selective brush. This provides a massive advantage for producing well-blended contrast, color, and exposure to any section of our image.
Therefore, when we want to give a dark look to the edges of our image, our gradient filter masks can easily do that for us. In Lightroom, the gradient filter transitions can have adjustments from 100% transparent to 100% visible.
3. Radial Filter Masks
This will enable us to create gradient-styled masks but in a more circular shape. The Radial Filter Masking technique is perfect for gathering attention to a particular area of our image or simply enhancing the brightness around the image’s subject.
This particular masking adjustment can affect the outer and inner sections of our radial mask. In this way, we’ll have significant control and more added options for our image’s mask effects.
4. Range Masks
This is one of the most incredible tools in Lightroom because it permits us to refine selective adjustment masks entirely based on luminance values or color.
The amazing part of this option is that we can create more accurate adjustments without affecting any surrounding areas of our image.
Honestly, this is a considerable advantage for isolating a particular adjustment and also getting a detailed and more specific edit on our photo.
5. Auto Masks
This is another feature in Lightroom that can easily be used alongside a selective adjustment brush. Instead of letting our adjustment go all over the edges, auto masks sample the exposure values and color to help us refine our masks.
Suppose, if we were masking on the edges of mountain peaks or buildings, an auto mask would ensure that we don’t spill all over the edges.
Why is Image Masking So Important In Editing a Photo?
Masks are basically used to control the editing adjustments in an image. Moreover, we can easily use them to refine adjustments along specific edges or even desire to entirely vanish a particular section of the picture.
There is a wide range of reasons why Image masking is so essential for image editing. For instance:
- Selectively applying adjustments
- Erasing backgrounds
- Blending multiple images
- Adding transparency
- Enclosing an idea into a shape
Image masking can efficiently and effectively spot the darker areas and adjust them accordingly, leaving the brighter spaces and regions of the image untouched.
Final Thoughts
There is various image editing software, but Photoshop and Lightroom are currently the easiest and most convenient options for Image Masking.
Not just masking, we can do various other image editings with this software. Undoubtedly, masking is one of the most crucial parts of image editing, especially when we want our image to look more professional and aesthetic.
We hope this article will now help us to know all the necessary details regarding Image masking!
You can Contact us Via LinkedIn, for any other queries!!!!
ABOUT US
